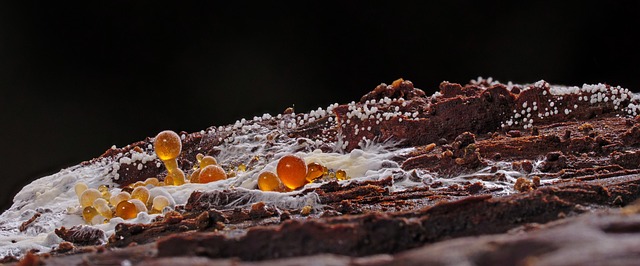
Mold Removal Guide: Step-by-Step Process for a Safe and Effective Cleanup
Overview
This comprehensive guide equips you to safely and effectively remove mold from your home or property. We'll walk you through each step, from identifying mold to post-cleanup verification, ensuring a thorough and healthy environment. Whether you're a beginner, intermediate, or advanced DIYer, these detailed processes and checklists will guide you through the mold removal process.
Step 1: Prepare and Protect
Time Estimate: 1-2 hours
Resources: Protective gear (gloves, goggles, mask), plastic sheeting, tape, fans, air purifier, cleaning supplies (detergent, bleach, water).
Process:
- Put on Protective Gear: Ensure your safety by wearing gloves, goggles, and a N95 respirator mask. These protect against mold spores and chemical fumes.
- Isolates the Area: Cover furniture and floors with plastic sheeting secured with tape. This prevents spore spread and makes cleanup easier.
- Set Up Ventilation: Open windows and doors, and use fans to improve air circulation. This aids in spore removal and reduces humidity.
- Consider Air Purifiers: Use portable air purifiers with HEPA filters to remove spores from the air during and after cleanup.
Decision Point: If the mold infestation is extensive or in a hard-to-reach area, consider professional help.
Step 2: Identify and Assess the Mold
Time Estimate: 30 minutes - 1 hour
Process:
- Locate Mold: Check for visible signs of mold, such as discolored patches on walls, ceilings, or floors. Mold may appear black, green, or blue.
- Determine Type: Different mold types require specific removal methods. Common indoor molds include Aspergillus, Cladosporium, and Penicillium.
- Assess Extent: Evaluate the size and severity of the mold growth. Small clusters may be manageable for beginners, while large areas demand advanced techniques.
- Document with Photos: Take clear pictures for reference and to track progress.
Scenario: A customer discovers a small, black mold patch on their bathroom ceiling. They decide to tackle it themselves as it's a contained area.
Step 3: Get Ready for Removal
Time Estimate: 15-30 minutes
Process:
- Gather Supplies: Collect cleaning solutions, detergents, bleach, and necessary equipment based on the mold type and extent.
- Test the Area: Check for high moisture levels using a hygrometer. Ideal humidity for mold growth is between 60-70%.
- Prepare Cleaning Solutions: Mix solutions as per manufacturer instructions. For small areas, a mixture of water and bleach (1 part bleach to 9 parts water) is effective.
Beginner Tip: For less severe cases, commercial mold cleaning products are available. Follow package instructions for safe use.
Step 4: Safe Mold Removal
Time Estimate: 1-3 hours (depending on size)
Process:
- Scrape and Scrub: Using a sponge or brush, gently scrape away loose mold. For hard surfaces, scrub with your cleaning solution.
- Wipe Down Surfaces: Clean surrounding areas to prevent spore spread. Use a damp cloth and your cleaning solution.
- Spray and Rinse: For tougher stains, spray the area and let it sit for 10 minutes before rinsing.
- Dry Thoroughly: After removal, dry the area with a clean towel or fan to prevent re-growth.
Intermediate/Advanced: For hard-to-reach areas or extensive mold, use a mold-killing solution or pressure washer. Always follow safety guidelines and wear appropriate gear.
Step 5: Disposal and Cleanup
Time Estimate: 30 minutes - 1 hour
Process:
- Bag and Seal: Place all moldy materials in a plastic bag and seal it tightly. Do not mix with regular trash.
- Dispose Responsibly: Contact local waste management for proper disposal methods. Some areas have specific guidelines for moldy items.
- Clean Surfaces: Wipe down all surfaces, including those protected during the cleanup, with a mild detergent.
- Deodorize: Use a natural deodorizer or essential oils to remove any lingering mold odors.
Industry Statistic: According to the Environmental Protection Agency (EPA), mold remediation can cost anywhere from $2,000 to $20,000 or more, depending on the severity and size of the infestation.
Step 6: Prevent Future Growth
Time Estimate: 30 minutes
Process:
- Address Moisture Issues: Fix any leaks or humidity problems that caused mold growth.
- Improve Ventilation: Ensure adequate air circulation, especially in damp areas like bathrooms and kitchens.
- Regular Inspection: Periodically check for mold, especially after water damage or high humidity.
- Maintain Cleanliness: Regular cleaning and dusting prevent mold spores from accumulating.
Troubleshooting and Common Issues
- Extensive Mold: If mold covers more than 10 square feet, consider professional help.
- Hidden Mold: Mold can hide behind walls or under flooring. Look for signs of water damage or musty odors.
- Allergies or Sensitivities: Wear protective gear and ensure good ventilation if you have allergies.
- Strong Chemical Odors: Ensure proper ventilation during and after cleanup. Use natural cleaners where possible.
Implementation Checklists
Beginner
- Put on protective gear.
- Isolate the area with plastic sheeting.
- Test for high moisture levels.
- Use a mild bleach solution for cleaning.
- Bag and dispose of moldy materials properly.
Intermediate
- Assess mold severity and extent.
- Prepare stronger cleaning solutions (e.g., bleach and water mixture).
- Consider using a mold-killing solution or pressure washer.
- Ensure proper ventilation and humidity control.
Advanced
- Inspect for hidden mold behind walls or under floors.
- Use specialized equipment like a moisture meter and air quality monitor.
- Implement a comprehensive mold prevention strategy after removal.
- Document the entire process for future reference.
Post-Cleanup Verification
Time Estimate: 15-30 minutes
- Inspect the Area: After cleanup, check for any remaining mold signs.
- Air Quality Test: Use an air quality monitor to ensure safe levels of mold spores.
- Hygrometer Check: Verify that humidity levels are below 50% to prevent future mold growth.
- Document Completion: Take final photos for comparison and future reference.
July 21, 2026
mold removal
Black mold, a health hazard in Los Angeles' humid climate, thrives in damp, poorly ventilated areas. Natural mold removal with non-toxic agents l.......
Read more →
July 3, 2026
mold removal
Basement mold in Seattle caused by high humidity, water leaks. Prevention: fix leaks, improve ventilation, keep humidity below 50%. Removal: professio.......
Read more →
June 19, 2026
mold removal
Understanding mold growth is key to effective removal. Early detection is crucial as mold hides behind walls. Address causes like water intrusion, con.......
Read more →
June 15, 2026
mold removal
Identifying emergency mold requires recognizing discoloration, musty odors, and powdery substances. Water damage is a primary cause necessitating prom.......
Read more →
June 5, 2026
mold removal
Mold thrives in damp, dark places, with black mold producing harmful spores. Prompt action is crucial to prevent health issues like sinusitis and asth.......
Read more →
May 16, 2026
mold removal
Wall-to-wall carpet mold removal in New York focuses on moisture control, natural methods, and thorough prevention. Identify sources of humidity and l.......
Read more →
May 8, 2026
mold removal
New York's damp conditions foster mold growth on wall-to-wall carpeting, with Cladosporium and Aspergillus common types. Natural removal methods.......
Read more →
May 2, 2026
mold removal
Mold, including Cladosporium, Aspergillus, and black mold, thrives in damp, humid environments. Removal requires understanding types, addressing moist.......
Read more →
February 14, 2026
mold removal
Mold thrives in dark, damp spaces, posing health risks. Early identification is key; natural methods like vinegar effective for minor outbreaks. Profe.......
Read more →
January 29, 2026
mold removal
Emergency mold assessment and natural removal are critical for home health and longevity. Certified professionals inspect for growth, identify root ca.......
Read more →